In addition to your daily, weekly, and monthly maintenance of the MAGPIX® instrument, there are preventative procedures you should perform every six and twelve months to keep your unit running smoothly year-round, and to help alleviate the wear and tear on your work-horse unit. Refer to your MAGPIX User Manual for step-by-step instructions.
The Daily, Weekly, and Monthly Schedule:
- Daily
- Start-up, calibration and verification (or verification only), shutdown
- Weekly
- Wipe down instrument
- Calibration (can be performed more frequently for high use users)
- Probe cleaning (perform more frequently as needed*), replace as needed
- Monthly
- Clean exterior surface
*Note: Increased probe cleaning may be needed in the following events: calibration failure, slow event rate is detected, sample empty errors, fluid dripping from the probe.
Biannual and Annual schedule:
- Every six months
- Replace syringe seal and o-ring
- Clean/replace air filters (bottom and back of analyzer)
- Annually (MAGPIX PM Kit, Cat #: CN-0287-01)
- Replace sample probe tube
- Replace drive fluid filter
Since you’re performing the daily, weekly, and monthly schedule on target and routinely, let’s focus our attention on the biannual and annual schedule.
Every Six Months:
Replace syringe seal and o-ring(Cat #: CN-0262-01)When you replace a syringe seal, also replace the black o-ring that fits inside it. One package contains four of each.
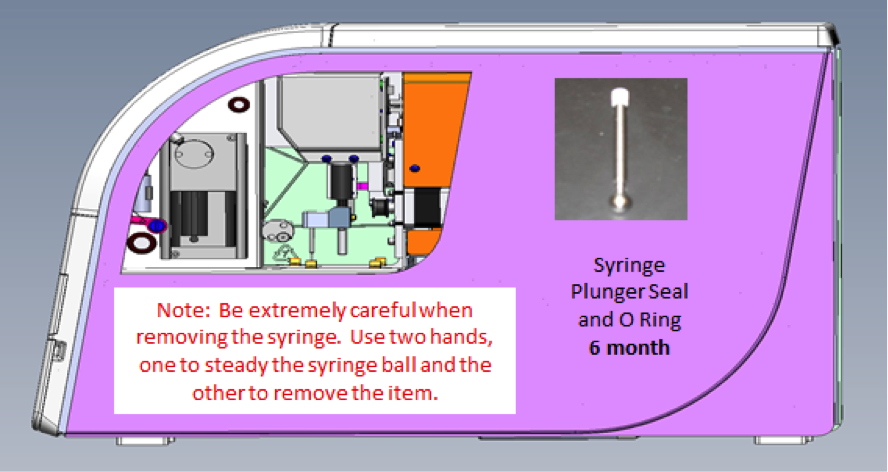
- Turn off MAGPIX and unplug the power cord. WARNING: The plunger guide does NOT deactivate while the seal is being changed; unplugging is necessary to avoid injury.
- Open the side access door of MAGPIX.
- Locate the syringe (glass cylinder with a metal rod plunger).
- Push the plunger guide down. The syringe may fill with clean Drive Fluid. NOTE: The plunger guide is tight. Be prepared to use some force to push it down.
- Unscrew the syringe from the top of its housing and carefully remove it.
- Pull the plunger out of the syringe and dispose of any Drive Fluid.
- Using a pair of pliers, remove the white plunger seal (at the top of the plunger) and discard it.
- Place the black O-ring inside the new white plunger seal and press the seal down on the top of the plunger.
- Return the plunger to the syringe.
- Screw the syringe back into its housing.
- Return the plunger guide to its original position. The bottom of the plunger fits into the indentation in the plunger guide.
- Plug in the power cord and turn on the MAGPIX.
- Use the software to run the prime command twice, watching for any leaks in the syringe area.
- Close the slide access door.

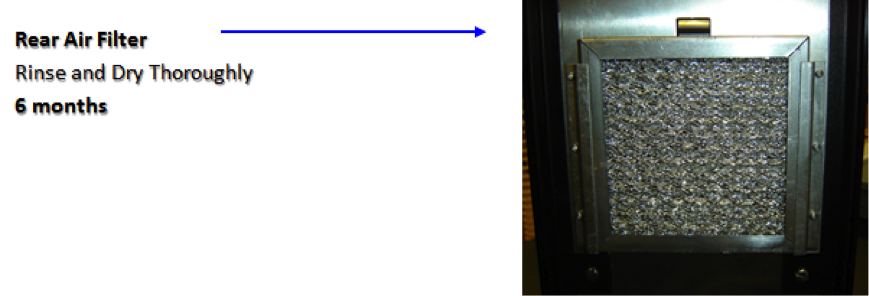
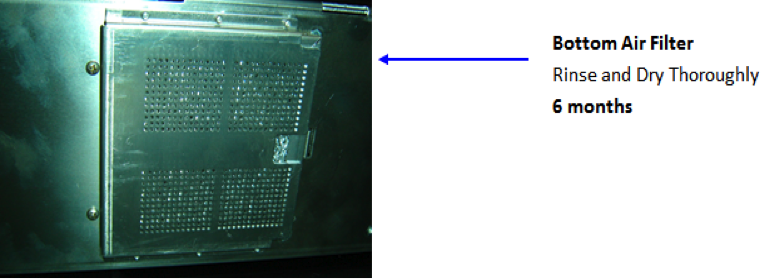
Clean/replace air filters (Cat #: CN-0257-01, if new filters are needed) MAGPIX unit has two air filters, one on the bottom and one on the back of the instrument. Remove these air filters and clean them. To clean the MAGPIX air filters:
- Turn off the MAGPIX and unplug the power cord.
- Slide the back filter up out of its holder.
- Lift MAGPIX and slide the bottom filter out of its holder toward the front of the instrument. Caution: Before removing the bottom air filter, remove both the waste fluid and drive fluid containers, the off-plate reagent block, and any microtiter plates in the instrument.
- Clean the filters with a vacuum or with distilled water. Stand the filters upright to air dry. Caution: Filters must be completely dry prior to reinstallation
- Locate the small incised arrow on the frame of the filter. This indicates air flow. The filter must be installed with the arrow pointing inward.
- Reinstall the filters.
- Plug in the power cord and turn on the MAGPIX.
Annually
Replace sample probe tube (Cat #: CN-0259-01)
The tube that connects the sample probe to the valve is subject to wear and tear because of the constant motion of the sample probe. Regular maintenance requires replacing it on a yearly basis.
- Turn of the MAGPIX and unplug the power cord.
- Open the side access door on the MAGPIX and locate the probe assembly.
- Unscrew the probe fitting completely. The sample probe tube is connected to it.
- Unscrew the ¼-28 flat-bottom fittings at the valve end of the sample probe tube. The sample probe tube is connected to it. Use pliers to disconnect the ¼-28 flat-bottom fitting if necessary.
- Pull the loose tube through the strain relief to remove it.
- Thread the new piece of tube through the strain relief.
- Screw the 1/4-28 flat-bottom fitting on the end of the new sample probe tube assembly into the valve where you removed the fitting during step 4. Tighten the fitting until it clicks.
- Screw the probe fitting on the end of the new sample probe tube assembly into the top of the probe assembly where you removed the probe fitting during step 3.
- Tighten the fitting until it clicks.
 |
|
Replace drive fluid filter (Cat #: CN-0258-01)
To replace the drive fluid filter, follow these steps:
- Turn off MAGPIX and unplug the power cord.
- Open the side access door on the MAGPIX and locate the Drive Fluid filter at the left of the syringe pump.
- Gently pull the filter form the mounting bracket.
- Unscrew the tubing from the top and bottom of the filter
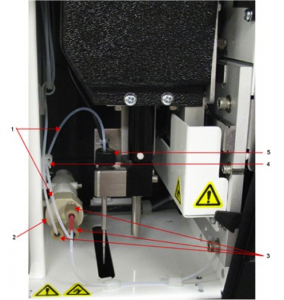
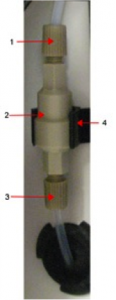
- Ensure that the drive fluid filter orientation (top and bottom) matches the following figure and reattach the tubing to the ends of the new filter. Tighten both, top and bottom, fitting until they click.
- Tube attachments (unscrew in step 4)
- Filter
- Tube attachments (unscrew in step 4)
- Mounting bracket
- Press the new filter into the mounting bracket.
- Close the side access door.
- Plug in the power cord and turn on MAGPIX.
- Use the software to run the Prime command twice. Ensure that the drive fluid is being pulled into the syringe during the prime.
 |
|
This post is part of Tech Tuesdays
Every Tuesday, we publish a post from our Field Application Specialist team. These experts will help you with the technical aspects of Luminex instruments and assays and their posts will cover a host of tricks, tips, and pointers to help you get the most out of your products.