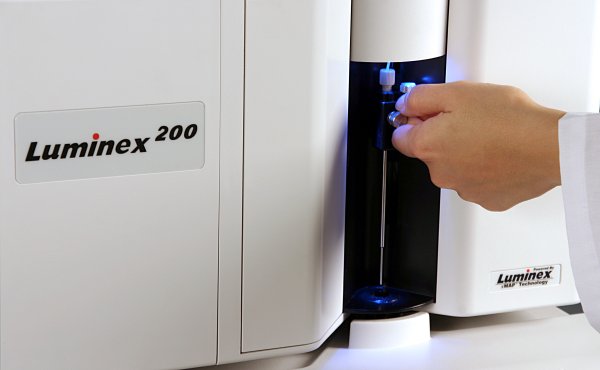
Does instrument maintenance sometimes fall off your calendar? The xPONENT® 3.1 software makes maintaining your Luminex® 100/200™ instrument quick and easy.
To keep your unit running smoothly year-round, follow the instructions provided in the instrument and software user manuals. However, this is a quick guide for maintaining your instrument.
If you are not currently running xPONENT software, contact your Business Manager or Technical Support to receive information on a software upgrade. You will be glad you did!
The Daily and Weekly Schedule:
NOTE: When 10% bleach is required, make sure you are using fresh bleach.
Daily:
- Perform “System Initialization” protocol:
- Laser Warm-up, Fluidics, and Performance Verification
- Note: The tasks included in the System Initialization can be changed as follows:
- Admin page/System Setup tab, adjust System Initialization settings, use pull-down menu
- Perform “System Shutdown” protocol at the end of the day
Weekly:
- Clean probe (sonicate >2 min, flush probe from small end)
- Run Self-Test
- On Maintenance page/Cmds & Routines tab
- Use drop down menu; select None and choose “Self Test”
- Run “Weekly Maintenance” protocol
- On Maintenance page/Cmds & Routines tab
- Use drop down menu
- Set to “Laser warm-up, Fluidics, Calibration, and Performance Verification” (See above for changing the tasks included in the System Initialization)
- Perform Calibration, change “System Initialization” protocol:
- Set to “Laser warm-up, Fluidics, Calibration, and Performance Verification” (See above for changing the tasks included in the System Initialization)
Bi-Annual and Annual Schedule:
- See “Schedule” tab under the “Maintenance” page.
As Needed Maintenance:
If you are not going to use the instrument for over a week:
- Run the “Prepare for Storage #1” and “Prepare for Storage #2” routine. When you go to run the instrument again, run the “Revive from Storage” routine.
- Routines are found on the Maintenance page/Cmds & Routines tab (use the drop down menu).
- When you get past about a week, the water held in the probe from the last set of commands has likely evaporated and possibly left a salt residue.
- If this happens just once or twice, you most likely won’t notice any issues. However, when the probe builds up the salt residue over time (many cycles of non-use) bead count issues start to arise.
Clogs/Fluidics failures:
- Try cleaning the probe as stated under weekly maintenance. See “How Well Do You Know Your Sample Probe?” blog.
- Note: Increased probe cleaning may be needed in the following events: calibration failure, slow event rate is detected, sample empty errors, or fluid dripping from the probe
- You can also try a sodium hydroxide cleaning procedure.
- Do an extra cleaning routine after every assay to help avoid the buildup in the probe that can happen when using serum samples:
- This protocol can be created in xPONENT by clicking on “Maintenance,” “Commands and Routines,” and while “None” is selected in the dropdown, create the following routine and save it:
- 1 x Sanitize with 10% bleach or 0.1N NaOH
- 1 x –Alcohol Flush
- 1 x Wash with diH2O
Probe height adjustment:
- Recommended between the use of different plate types, if the instrument has been moved, if maintenance on the probe has been performed, or if calibration fails.
- See the How-To video for details (http://luminexcorp.hubs.vidyard.com/watch/BYkxpuy8Wu2HGJ85m2PW44).
- Replace probe if bent
Refer to your xPONENT Software User Manual for step-by-step instructions.
This should give you a good start, but for more in-depth, step-by-step instructions, refer to your xPONENT Software User Manual. You can also find a number of maintenance and help videos on our website. Find them here!