You have conducted your experiment, prepared your samples, performed the initial steps of your assay, and have finally reached the moment of truth. You hit “run,”stare intently at the screen in anticipation of your results and . . . nothing. Still nothing. Finally your sample times out. Don’t panic. Where are your beads? Let’s take a look at where they may have gone.
Stop your run. Remove the plate and store it in the dark.
Next, check the obvious. Did you add the beads? Were they vortexed sufficiently before being added? Is the sheath fluid empty? Are you reading the correct wells on the plate?
While there are many possible reasons for bead acquisition problems, the most common culprits are probe related. Remove the probe, clean it, replace it, and adjust the height. If you are unsure of how to do this, please watch the “Luminex 200 Probe Height Adjustment” video found here.
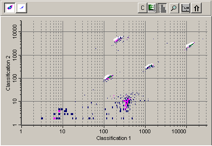
If a problem still persists, there are other possible reasons. Does your bead map look normal? Most of these will present themselves as very specific irregularities on the bead map. Keep in mind that in order for a bead to count as an event, it needs to fall into its proper place or bead region on the bead map. Bead regions are represented by white, cloud-like spaces on the bead map and correspond to specific bead numbers.
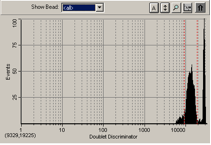
If there is excess air present in the system, you will see a blob on the bottom of the bead map and a peak to the right of the gated beads. Excessive air can cause delays in bead acquisition.
If the beads have been photobleached, they will fall down and to the right of their regions as seen here. This will cause delays in bead acquisition as well. Remember to protect beads from exposure to light. Keep in mind that if your refrigerator has a glass door and the light is on in the room throughout the day, or if you are constantly going in and out of the refrigerator (and the light goes on every time you open the door), that box may be constantly exposed to light. If your box is a little beat up, you may be exposing your beads and SAPE to more light than you realize. In that case, it may be safer to transfer the entire box into a bigger box to ensure there is no exposure to light during storage.
If the beads are ultimately being resuspended in an incompatible buffer, they will appear elongated as seen here, and once again cause trouble with bead acquisition. Make sure to use the exact buffer formulation that your protocol calls for. If you are making the buffer from scratch or diluting it, please do so with a pipette rather than estimating it.
If you have a sample that times out, please follow these tips. We wish you success in your next run!


